Practical Anaconda Installation Step-by-step Tutorial
Anaconda provides a comprehensive platform for data science and machine learning, making it easier to manage packages and environments. This tutorial covers the installation process, ensuring that users can set up Anaconda efficiently and start their projects with the right tools at hand.
What is Anaconda?
Anaconda is a popular open-source distribution of Python (and R) that simplifies package management and deployment. It is widely used for scientific computing, data analysis, machine learning, and artificial intelligence. Here are some key features of Anaconda:
- Comprehensive Package Management: Anaconda includes conda, a powerful package and environment manager.
- Pre-installed Libraries: It comes with hundreds of scientific libraries and tools, saving you time and effort.
- Cross-platform: Anaconda supports Windows, macOS, and Linux.
- Easy Environment Management: Quickly create, export, and switch between different project environments.
- Integrated Tools: Includes Anaconda Navigator, Jupyter Notebook, Spyder, and more for interactive development.
Installing Anaconda
Follow these steps to install Anaconda on your computer:
- Visit the Anaconda download page and choose the installer for your operating system (Windows, macOS, or Linux).

- Go to your download directory and open the file that starts with Anaconda3.

- Start the installer and click “Next”.

- Click “I Agree” to accept the license agreement.

- Choose “Just Me” to install for your user only, or “All Users” to install for everyone on your computer. Click “Next”.

- Select your installation directory (the default is usually
C:\ProgramData\anaconda3).
- Additional options: Check or uncheck options according to your needs and click “Next”.

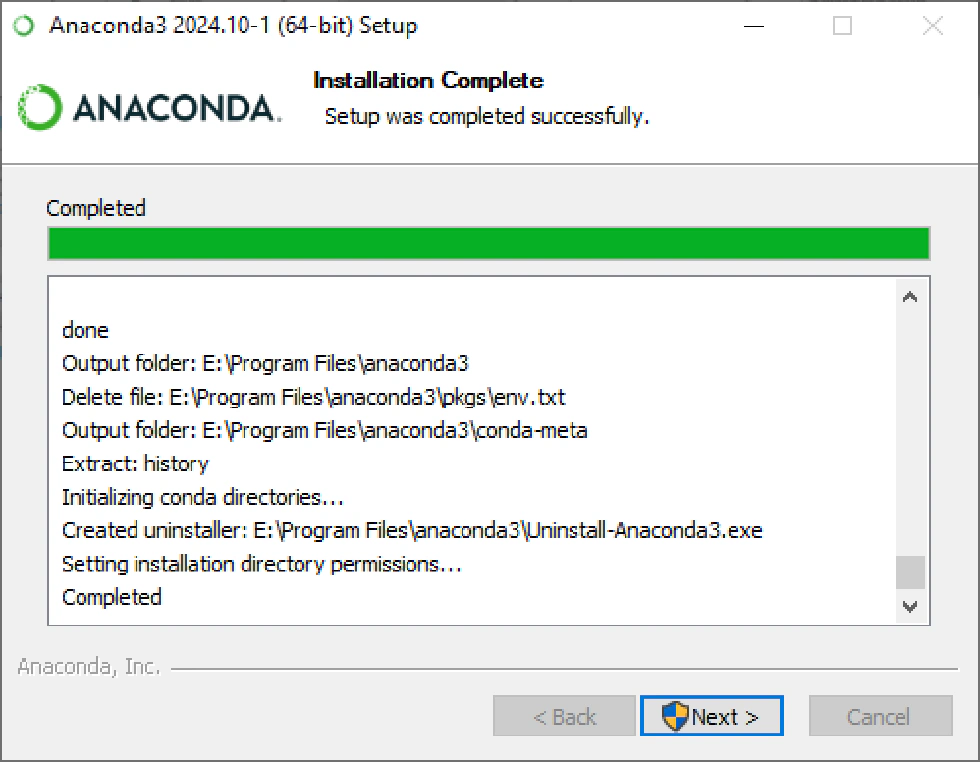
- Wait for the installation to complete and then click “Finish”.

Configuring Anaconda
To ensure you can use Anaconda from any terminal window, you need to add it to your system PATH:
- Copy your Anaconda installation directory from the previous installation step.

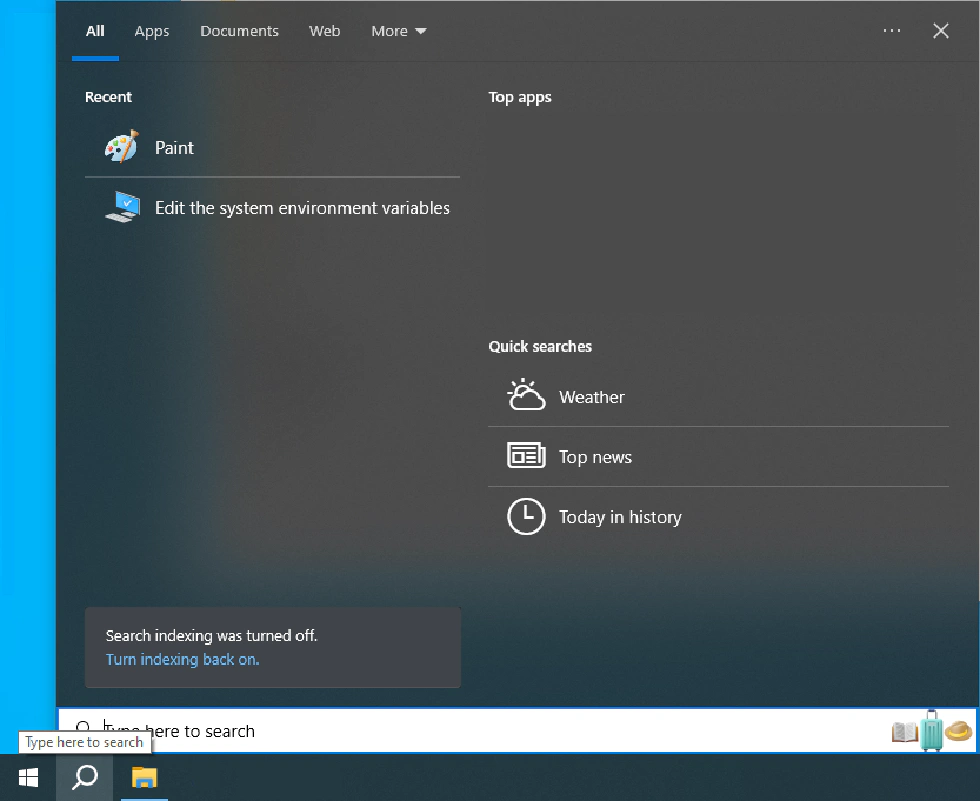
- Click the Search button next to the Start button, type “system environment”, and select “Edit the system environment variables”.

- In the System Properties window, click “Environment Variables…”.

- Under System variables, find Path and double-click it. (If it doesn’t exist, click “New…” to create one.)

- On the right side, click “New” and add the following entries (replace
'your conda path'with your actual Anaconda directory):
'your conda path'\anaconda3'your conda path'\anaconda3\Scripts'your conda path'\anaconda3\Library\bin
- Click “OK” on all dialogs to save your changes.
Verifying Anaconda Installation
- In any folder, hold SHIFT and right-click, then select “Open PowerShell window here”.

- Type
conda --versionto check your conda is successfully installed.
congratulations! Anaconda is successfully installed and configured on your system.
Conclusion
Anaconda makes Python environment and package management simple, efficient, and reliable. Now you’re ready to start exploring the world of data science, machine learning, or scientific computing with Anaconda. Happy coding!