Free to Use GitHub Copilot in Visual Studio Code Tutorial
Leveraging GitHub Copilot within Visual Studio Code can significantly boost your coding efficiency. This tutorial walks you through integrating and using Copilot to enhance code completion, streamline problem-solving, and automate repetitive tasks. Whether you’re new to Copilot or looking to refine your skills, this guide will provide helpful tips, common issues, and techniques for getting the most out of this powerful tool in your development environment.
What is GitHub Copilot?
GitHub Copilot is an advanced code completion tool developed by GitHub and OpenAI. It leverages generative artificial intelligence to assist programmers by autocompleting code snippets and providing suggestions based on the context of the code being written. Released on June 29, 2021, Copilot is available through a subscription model for both individual developers and businesses. Users can choose from various large language models for code generation, enhancing their coding experience.
Step 1: Register for a GitHub Account
If you don’t already have a GitHub account, you’ll need to create one. Visit GitHub’s official site to get started.
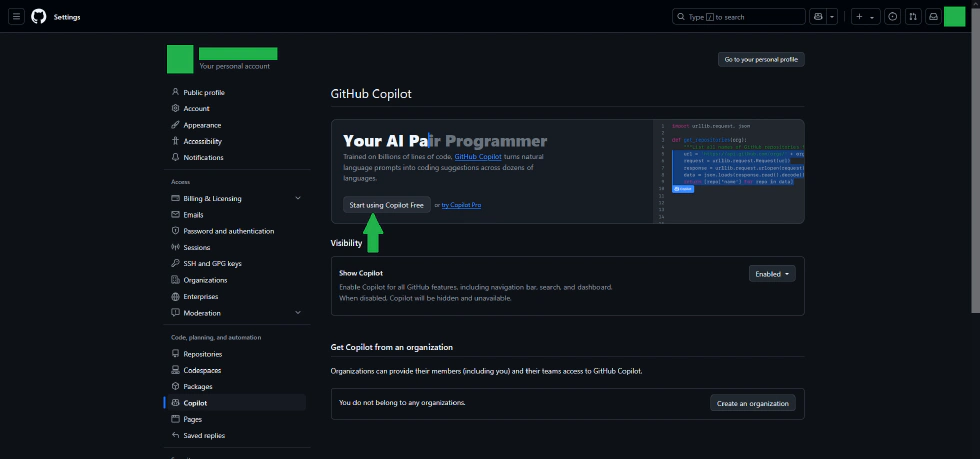
Step 2: Apply for GitHub Copilot
Once you have your GitHub account, follow these steps to apply for GitHub Copilot:
- Log in to your GitHub account.
- Navigate to GitHub settings.
- Click on the “Copilot” option in the left sidebar.

- Click the blue “Start using Copilot Free” button to apply for access.

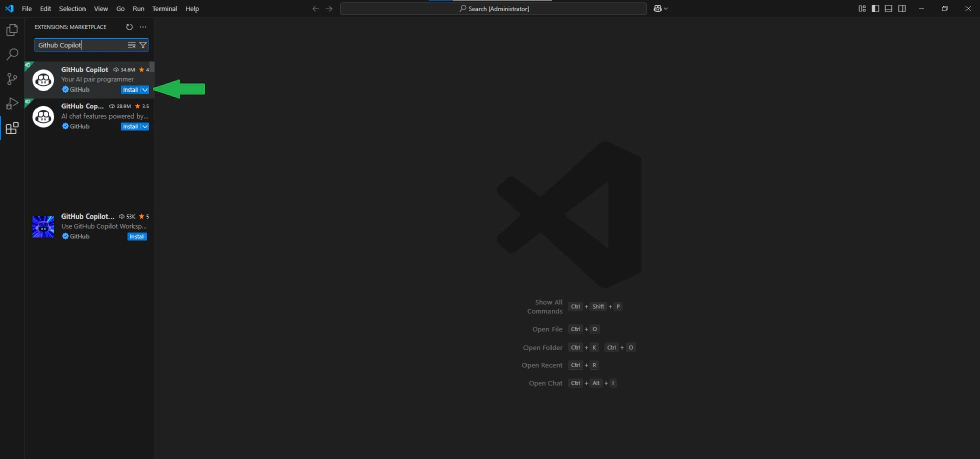
Step 3: Install the GitHub Copilot Extension in VSCode
With your Copilot access granted, it’s time to install the extension in Visual Studio Code:
- Open Visual Studio Code.
- Click on the Extensions icon in the left sidebar.
- In the search bar, type “GitHub Copilot”.
- Click the blue Install button to add the extension to your VSCode.

Step 4: Deploy GitHub Copilot in VSCode
After installing the extension, you need to sign in to use Copilot:
- Click the icon next to the search bar that says “Sign in to Use Copilot”.

- In the Copilot dialog, click the blue “Sign in to Use Copilot” button.

- VSCode will open your system’s web browser and direct you to the GitHub website. Here, click the green “Continue” button to confirm your account.

- Click the green “Authorize Visual Studio Code” button to allow Copilot to access your VSCode.

- A redirect window will pop up; click the “Yes” button to return to VSCode.

- In the Copilot dialog, click the blue “Sign in to GitHub.com” button.

- A pop-up window will appear. Click the “Allow” button to confirm the GitHub Copilot extension’s access to your GitHub account.

- Select your GitHub account (your account name).

- Congratulations! You are now ready to interact with GitHub Copilot.

Conclusion
GitHub Copilot is an innovative tool that can significantly enhance your coding efficiency and creativity. By following the steps outlined above, you can easily set up and start using Copilot in Visual Studio Code. Whether you are a beginner or an experienced developer, Copilot can help streamline your workflow and inspire new ideas as you code. Happy coding!